How to host your website in 3 steps using AWS Amplify

Congratulations! You’ve been working on a website for a while now and it’s finally time to share it with the world. In this article, we will cover:
- Purchasing a domain name with AWS Route 53.
- Linking your git repository to AWS Amplify.
- How to host your website all using AWS.
At this point, everybody knows about or uses Amazon, but did you know about “Amazon Web Services (AWS) ”? AWS is a comprehensive cloud computing platform provided by Amazon. It’s a powerful service that simplifies web hosting for both static and dynamic web applications. Think about AWS like a big toolbox that helps you update, maintain and put your website on the internet.
Create an account and log into the Amazon Web Services management console.
We can start by using AWS Route 53 to see if our desired domain name is available. Here, I chose to purchase the “.com” domain extension which also includes privacy protection.
I needed to wait roughly 30 minutes for my domain name purchase to complete and receive my confirmation email. You will also receive another email to "Verify your email address for domain_name_here", double check your spam folder. The completion of this purchase also creates a “Hosted Zone”. Which is a collection of DNS records that define how to route traffic for a domain and its subdomains. Visit the Hosted Zone if you purchased a domain name outside of AWS Route 53 to add any necessary records.

AWS offers different options to host your website. I believe AWS Amplify is a great choice due to being able to scale based on incoming traffic. Additionally, Amplify is extremely user friendly and can help you quickly launch a website, prototype or MVP without having to manage much infrastructure. If your company or product becomes an overnight sensation or new TikTok trend, you will be ready to open the flood gates.
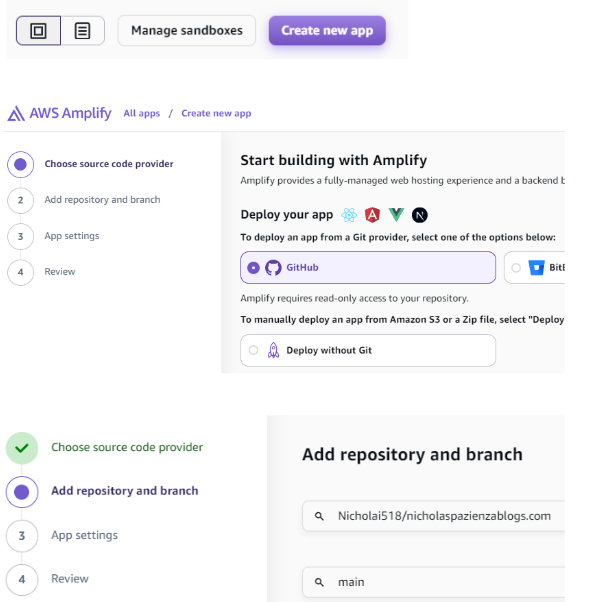
Now, let's use AWS Amplify to create a new app by selecting the "Create new app" button. I chose GitHub for my source code provider, but there are other options available. Select your desired repo / branch and change any necessary settings. I kept the default App settings and launched my app.

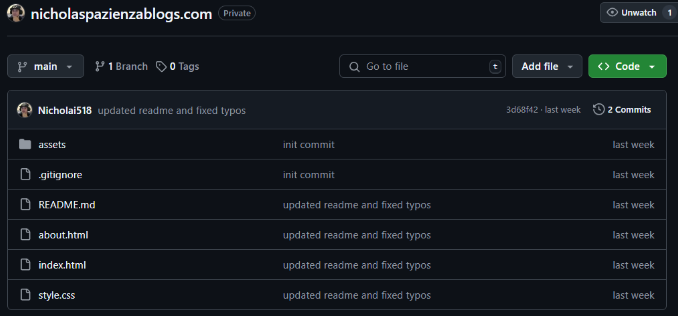
In my case, I specifically selected my “nicholaspazienzablogs” repository and main branch which contains five files. Anytime I push updates to my main branch, AWS will reflect those changes after just a few minutes.

Now you will see your website name under “All apps” within the Amplify service. Click on your App and select the following: Hosting > Custom

Click within the box to begin typing and select the domain name you purchased using Route 53. Then click Configure domain > Add Domain to add your domain name.The hosted zone that was created earlier should have some new records added to it now. Go ahead and open a new tab to visit your website.
Learning how to build and host a website is an extremely valuable skill. You can create yourself a “Portfolio Website” to bring your career to the next level, or you can help a friend or family member build and host a website for their new business. In the past, I've used a mixture of different technologies to host a website (GoDaddy.com, Digital Ocean, etc) and it became complicated to keep track of everything. That’s why I advocate for learning more about AWS.I really like that AWS is a “One stop shop” which offers many different services to accomplish your goals.